

You can find a Gradle plugin to do just about anything with Java. If you have ever worked on any modern Java application with this build tool, then you are no doubt accustomed to importing and applying plugins to the top of your `.gradle` files before you can build.
However, in some cases, you’ll encounter a missing link that cannot be adequately addressed by anything on the web. I have encountered this situation several times and was surprised by how easy it was to mend this discrepancy.
For those of you who like to see the end before the beginning, here is the final result of my Gradle plugin.
The Blueprint
There are a few concepts I’ll discuss which do not readily appear in the Gradle documentation but turn out to be quite helpful during testing. Once we have Gradle (the build tool for the plugin itself) and our IDE configured as needed, then we can proceed to build our plugin.
Here is the three-step outline, which I break down in detail later on:
- Create an extension to configure the plugin’s behavior
- Register the plugin
- Create a task to run the plugin
The rest of this article is pretty much just a ceremony to get the project created, and the IDE set up.
Building a Real Plugin
Abstract theory, quippy snippets, and exercises left for the reader don’t help when it comes to getting started on a new topic. Instead, this article shows how to build a plugin from scratch. Here is what we are going to develop:
Build a Gradle plugin that extracts the unit test coverage metrics from a JaCoCo XML report file and display those numbers in the build output.
This small task can provide a remarkable piece of insight into a company’s CI/CD pipeline and project health. For example, where I work at UPMC Enterprises, we use GitLab CI. GitLab requires the coverage report numbers to appear in the build log before it can hook into those statistics and report on them. Hence, our need for such a tool.
Requirements
Here is a general specification list on what our plugin must accomplish:
- Be able to support reading and reporting data from multiple coverage reports, corresponding to one or more modules within a project
- Support displaying all statistics types generated by JaCoCo: Instruction, Line, Complexity, Method, and Class
- Allow the user to turn on or off these statistics types
- If multiple coverage reports are present, show an aggregate of all of the statistics at the end
- The coverage metrics extracted by the plugin show as percentages, i.e. (number of lines covered) / (total number of lines) * 100
- Enable or disable the entire plugin with a flag
In concrete terms, if you generate a JaCoCo coverage report, the XML looks like this, showing how different analyses uncover which areas of your code need attention:
The plugin should allow the user to enable or disable showing any of these metrics, and combine the statistics of multiple reports from one or more modules so that the overall health of the project can be understood.
In the end, I would reasonably expect our plugin to be configurable as follows, assuming I have a project with one application module and two library modules:
Wherein the output would look like this:
That’s our objective. Let’s get started.
Getting Started
IntelliJ IDEA is my IDE of choice, but feel free to use any with which you are comfortable. These steps are generic enough that you could even write the code in a text editor and run the compiler from the command line. Also, since I prefer Kotlin over Java, I’ll forgo using Java altogether and write this plugin with JVM Kotlin.
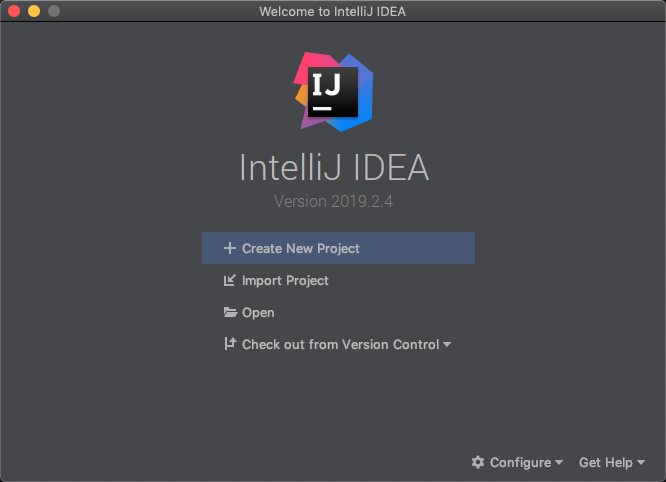
To begin, fire up the IDE and create a new project.
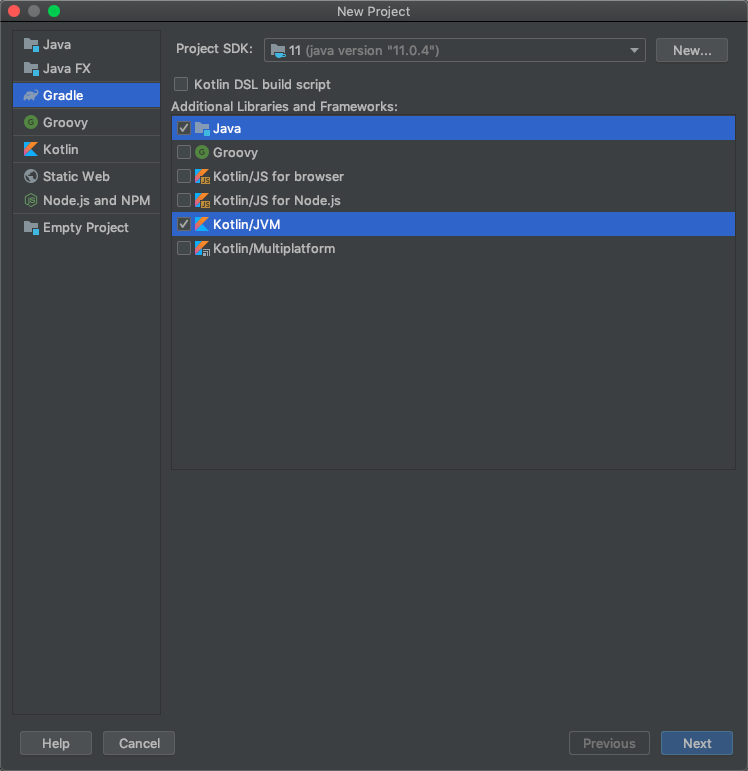
As part of the wizard, select Gradle as the project type and add support for Java and JVM Kotlin.
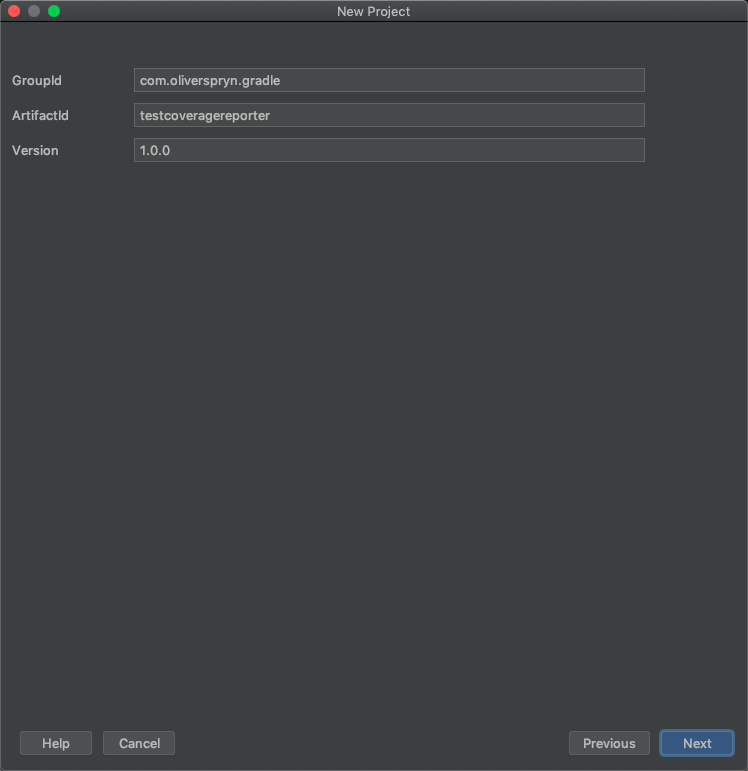
On the next screen, let’s define the Group ID, Artifact ID, and Version of the project. Here are my rules of thumb:
- Group ID: The reverse domain name of my website, followed the kind of project I am building (e.g., `gradle` for Gradle projects, `mobile` for Mobile projects, etc). Thus, for this project, I use `com.oliverspryn.gradle`.
- Artifact ID: The name of the JAR file without any spaces or capital letters, corresponding to the name of the project. So, for this example, I use a `testcoveragereporter`.
- Version: I follow the Semantic Versioning 2.0.0 standard for my software releases. So, since I plan on releasing this pretty quick (as opposed to having several iterations in development), I jumped straight to 1.0.0.
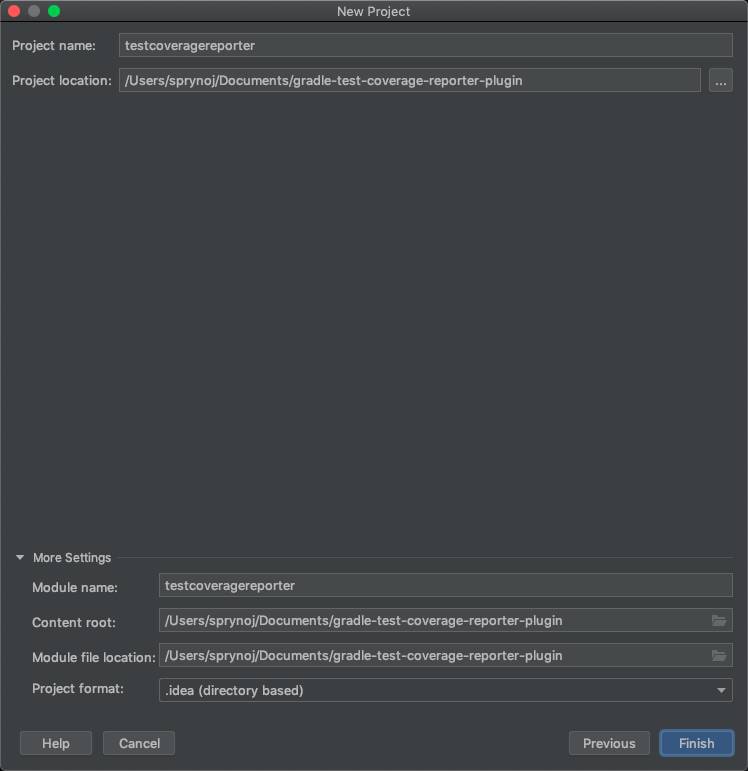
For the last step of the wizard, make sure that the Project Name matches the Artifact ID created above. Then, click Finish.
Clean-Up & Set-Up
Our project is ready for development. First, let’s clean up a few parts of our project that we don’t need. In the project explorer on the left, I’ll expand the `src` folder and highlight a few directories to delete:
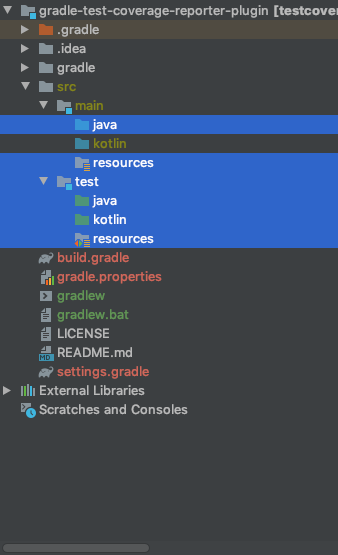
I don’t need these since I won’t be writing any Java (I’ll write this plugin in Kotlin), and I don’t need any resource files, such as images or other external files. Ironically, I won’t be writing any unit tests for this plugin either, so I’ll also delete the `test` folder.
Next, let’s open up the `build.gradle` file and change some of its contents.
For clarity, this baseline Gradle file helps us accomplish a few things:
- Imports JVM Kotlin (`1.3.50`, in this case) so that I can write my plugin using the Kotlin language
- Targets Java 8 (referred to as `1.8` in this file)
- Retains the `group` and `version`, as specified during the project creation wizard
At this point, IntelliJ is ready to start helping you build your project. You may notice two prompts in your editor.
First, this one:

Click the Ok, Apply Suggestion button to have IntelliJ download all of the necessary tools for Gradle to build your project.
Next is this one:

Click Enable Auto-Import, since this causes IntelliJ to immediately begin providing support for code hints for libraries you add to this project.
For good measure, create a `.gitignore` file and populate it with the directories which should not be checked in:
Scaffolding the Plugin
We’ve reached a point in our set up process where it is necessary to start defining the intention of this project. As of now, our build process is capable of creating any kind of Kotlin project we can imagine. We need to hone this project so that we can use it to build a Gradle plugin with Kotlin.
First, create the package structure you wish to use for your project under the `src` folder. For mine, I matched the Group ID and created a package called `com.oliverspryn.gradle`. Next, I created a stub class matching the name of the Artifact ID, with the word "Plugin" at the end: `TestCoverageReporterPlugin`.
Let’s open up the `build.gradle` file again, and add in the necessary additions to register the plugin:
These changes identify the name and ID of the plugin, configures its entry point as the class we created above, and exposes the Gradle library to us so that we can have access to its APIs as we write our code in Kotlin.
Herein lies the essential part of developing a plugin. We need to instruct Gradle to publish the compiled plugin to a local folder to serve as a repository for other modules to reference. This practice saves the developer from pushing to an external, public repository to test the success of a minor change.
Once again, referring to our `build.gradle` file, add in these changes:
Also, open the `settings.gradle` file and append this block to the top of the file:
These additions instruct Gradle to first look at a local folder called `./repo` for any local sources which can provide the necessary plugins before going online to download the rest of the required plugins.
To confirm that everything is working as planned, open the Build Configurations menu in IntelliJ > Edit Configurations. I added this change to my IDE’s build configuration, saved it, then built my project successfully for the first time.
I’m going to consider this to be our first checkpoint. For your reference, here is a link to the repository which reflects the current state of our project.
Step 1: Create the Extension
The most difficult of our setup is now behind us. Now, we can write real code. The focus for this section is to create this part of our interface:
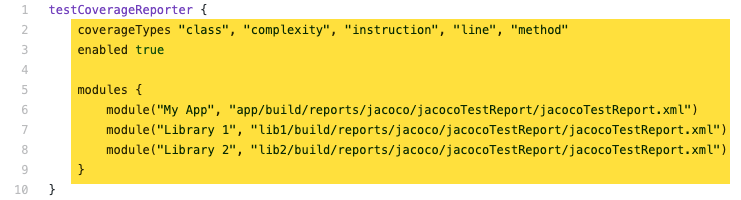
Gradle calls this an extension. This convention is the user’s way of communicating how the plugin should behave. It is quite common to see these; however, if your plugin has nothing to configure, then it is perfectly valid not to have one.
To create our extension, add a class called `TestCoverageReporterExtension`, and populate it, like so:
This code may seem like a lot to take in, but it breaks down very nicely. Let’s start by looking at the three properties you can set, as shown in the region called `Model` (lines 14–16).
- `enabled`: The simplest of our three options. It is a property on the extension class that the user manipulates directly by interfacing with it through the DSL.
- `coverageTypes`: This interface takes advantage of Groovy’s syntactic sugar. It has a backing field for storing the configuration in memory, but it also has a method with the same name, which has a single `vararg` property. This method allows the user to pass in which coverage types he or she desires to extract as a set of comma-delimited strings. These strings are then collapsed together into a list, and then stored in the backing field.
- `modules`: This option is the trickiest of the bunch, but also the most powerful. Calling the `modules` block is effectively the same as calling the `modules()` method. Thanks to the `ObjectFactory` I assigned to the `modules` property, Gradle creates a new instance of the `Modules` class and allows us to execute any `Action<>` within the scope of that class. Therefore, as you can see, we can directly access the `module()` method and use it to add the name of each module and its corresponding report to a list. It’s playing by the rules to make instantiating a class and calling its methods to behave as a DSL.
Step 2: Register the plugin
This step is, I promise, much more straightforward. For clarity, the plugin itself refers to this part of our interface:
We already have the class that we need to create our plugin. Right now, it is only a stub called the `TestCoverageReporterPlugin` class. Let’s change that stub to look like this:
This class declares itself as a Gradle plugin by extending the `Plugin<>` class. Notice the call to the `create()` method. It configures three things:
- The name of the block for the Gradle DSL is defined to be `testCoverageReporter`
- It creates an association between the plugin and the extension
- It passes an instance of the `ObjectFactory` as a parameter to the constructor of the `TestCoverageReporterExtension`
Now is a good time to mark our second checkpoint. Here is the current state of the project.
Intermission: Get Ready to Test
This next section prepares us to write and test the core business logic of our plugin. The easiest way to check our work is to create a demo project which pulls the plugin under development from a local folder and executes it.
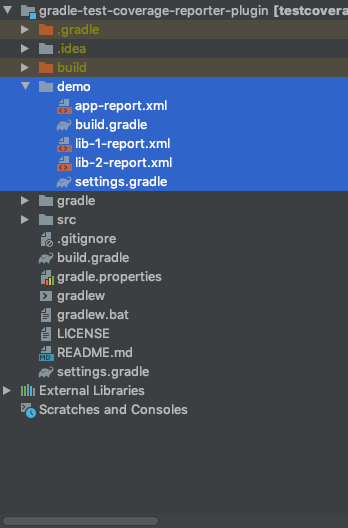
Let’s create a new module to simulate a "project," which is using our plugin in production. I found that the easiest way to do this is to create it manually. In IntelliJ, create a `demo` folder at the root of the project, and add in these files:
- `build.gradle`: The build script for our fake "project."
- `settings.gradle`: Required by Gradle for all modules. Leave it empty.
- `app-report.xml`, `lib-1-report.xml`, `lib-2-report.xml`: Example JaCoCo coverage reports for testing purposes. You can find a GitHub Gist here with all of the content I put inside of them.
Here is the structure of the project:
The most important aspect of our new "project" is the build Gradle file. Here is what I put inside of it:
For the most part, this code shouldn’t look too unfamiliar. The build script block tells Gradle where it should resolve its dependencies, and which plugins to import. Down below, we apply the plugin. Notice how I matched the `classpath` and even the Group ID and Plugin ID we established in the main project’s `build.gradle` earlier on. Last, is the plugin block itself, with all of its extension properties.
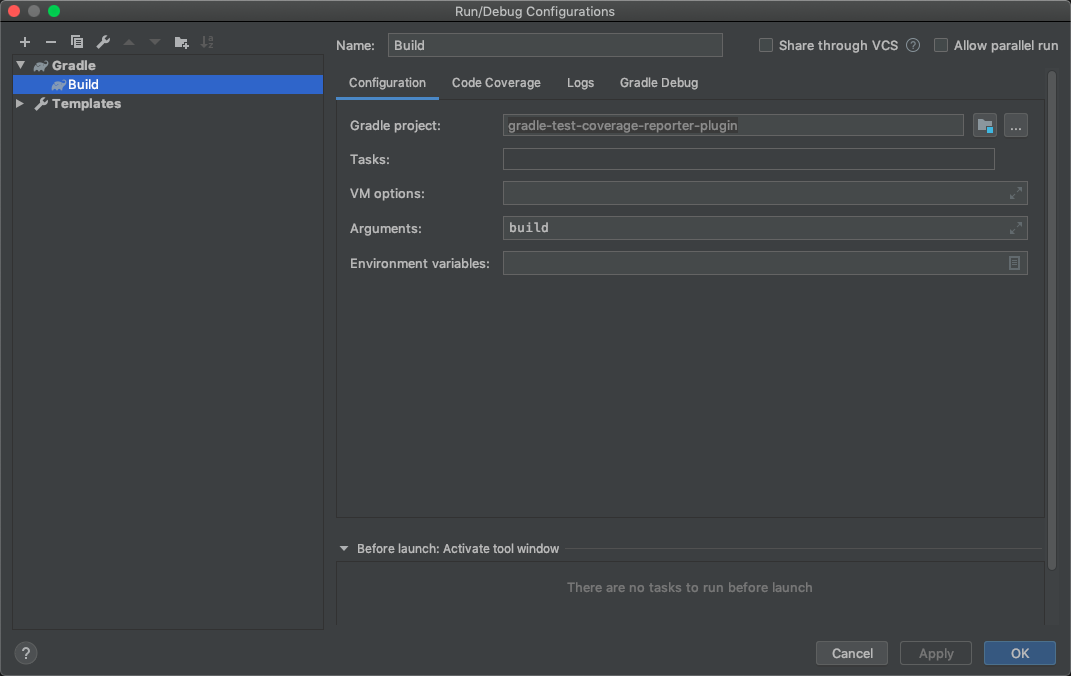
Now, let’s build the plugin and upload it to our local repository. In IntelliJ, let’s add another build configuration.
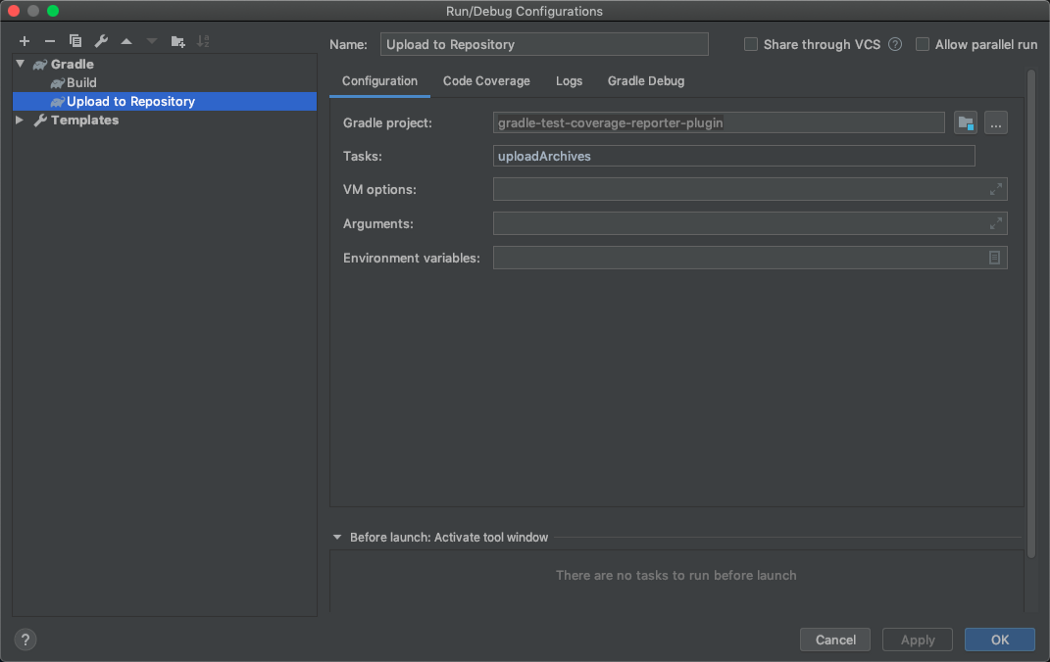
Notice we have access to a task called `uploadArchives`. That is thanks to the maven plugin we imported into our root project’s `build.gradle` file. Save your new build rule, and then use IntelliJ to run your Upload to Repository task.
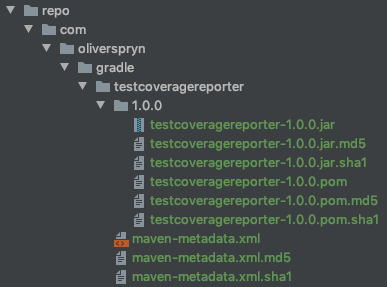
You’ll notice a new folder appear in the Project Explorer called `repo`.
Excellent. We are ready to begin our testing. Before we move onto the next step, take a moment to ensure you Git Ignore everything you don’t want to be checked in.
Once again, here is another checkpoint in our repository.
Step 3: Create a Task
All of the work we have accomplished up to this point is unusable unless we create a task to kick-off our plugin and run some meaningful code. Let’s begin by creating a new class and call it `TestCoverageReporterTask`. Here is what a stub for this class should look like:
There aren’t any surprises in this sample. All custom tasks inherit from the `DefaultTask` class supplied by the Gradle API. The method called `extractFromReport()` could be named anything. The only part that matters is the `@TaskAction` annotation so that Gradle can identify which function to run.
The only remaining, unexplained piece of this class is the extension, which Gradle passes into the constructor. One might wonder how that gets there. Open up the `TestCoverageReporterPlugin` class, and I’ll show you the necessary additions.
Notice the additions to the `create()` method. This function accomplishes three things:
- Declares a custom task named `extractTestReport`, which appears in the Gradle task graph for a user to run
- Associates the task name with its implementing class
- Passes any number of arguments to the constructor of that class. In this case, I only need the `extension`, so it is passed in as the first argument.
Now, before running your custom task, let’s add it in as a Build Configuration to IntelliJ. This one, I’ll call Extract Test Report:
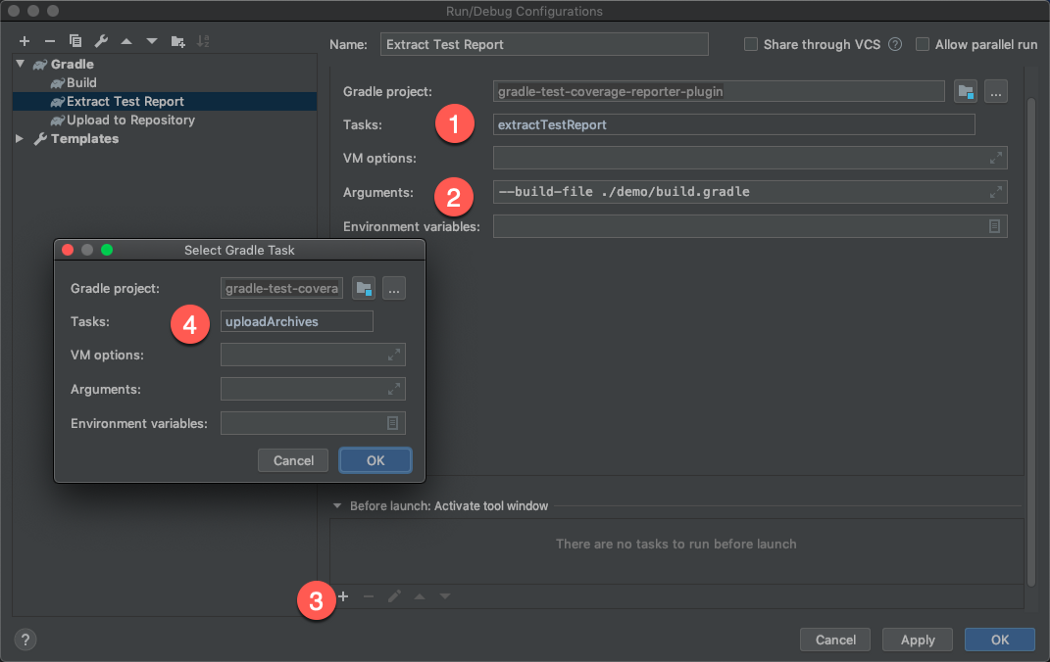
We can now use the new task created above. Enter `extractTestReport` in the Tasks field. Notice the additional code I passed to the Arguments field so that I end up building the `demo` module, which is the module that uses this plugin. Also, down in the Before Launch section, I add a Gradle task to run the `uploadArchives` task. This task ensures you always have the most up to date version of your plugin before running your demo project.
After saving your work, kick-off this task from IntelliJ, and look to see the resulting output in your Run console.
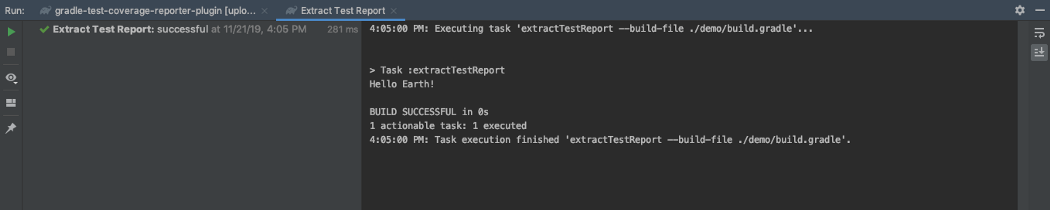
That’s it! I’m not going to bore you with the details on how to read XML in Kotlin, but if you are interested in what goes inside of the commented out section in the Test Coverage Reporter Task, you are welcome to see it here.
Here is the current state of our plugin.
Bonus Section: Publishing the Plugin
You’ve finished the hard work. Sit back and savor the moment. You may appreciate the opportunity to share your work with the world. Herein is the purpose of Gradle’s Plugin repository.
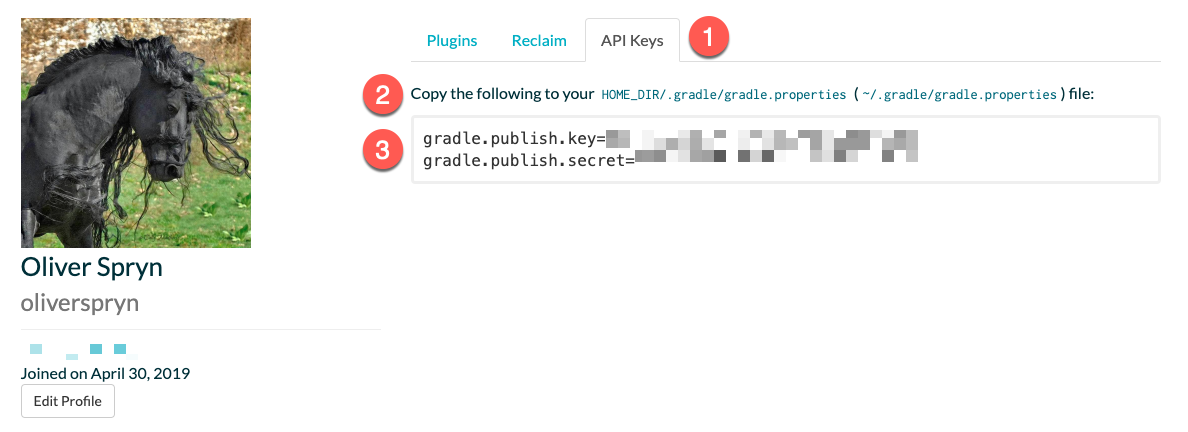
To begin, make sure you have created an account on Gradle’s website. Once your account is set up, navigate to your profile, select the API Keys tab, and follow the included directions.
Once you have configured Gradle, we need to make one last change to our `build.gradle` file. Open it up, and add in these lines:
The content of the data you supply to the publisher is entirely up to you since it appears on the Gradle repository’s website. I use the same description and tags as the GitHub repository that hosts its source code.
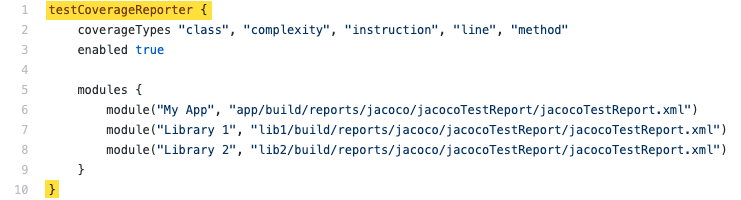
Notice how the name of the plugin — the `testCoverageReporter` inside of the `plugins` block — matches the name of the plugin declared in the `gradlePlugin` block. Here is the relevant code from earlier, which highlights this similarity:
This convention is necessary to tell Gradle which plugins to publish. In most cases, this is useful if your project contains more than one custom plugin. However, since our project only contains one plugin, our work is easy.
Lastly, with our new code in place, publish your plugin by building it and then pushing it up online.
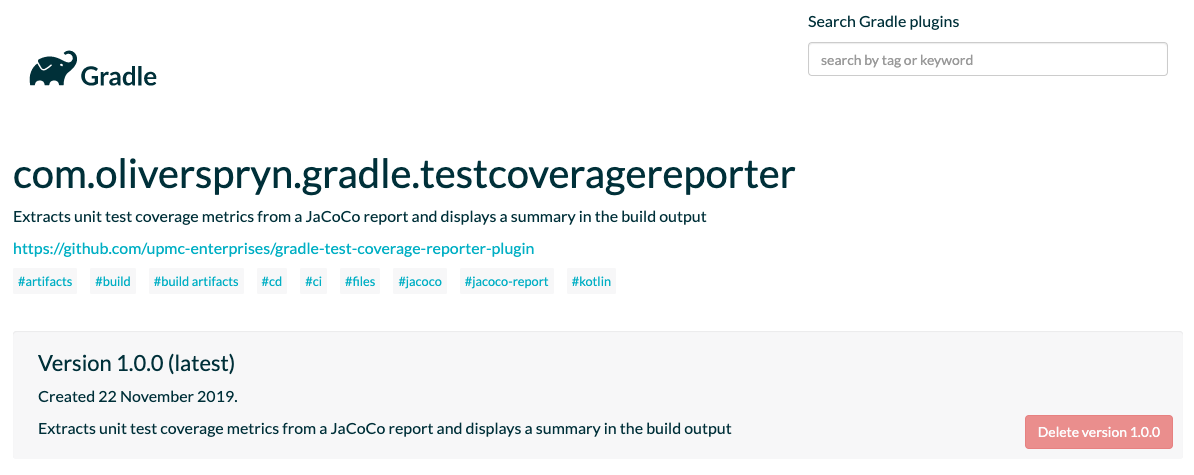
Here is what this plugin looks like when published on the repository:
Conclusion
Hopefully, this article has given you enough confidence to build your plugin. The steps are remarkably similar in most cases. By bootstrapping your project and IDE, then following three simple steps, you are well on your way to filling whatever niche your project requires.
Wherever your DevOps needs may take you, I wish you all the best on your journey and can’t wait to see what you build.
.svg)


 DR Android


