

Git is full of useful commands, powerful capabilities, and often overlooked features. One of its hidden gems is its ability to sign commits and tags with a key. For this job, Git turns to GPG, a widely-adopted and open-source program designed for tasks such as this.
The team behind GPG, or the GNU Privacy Guard, describes it as a program that "allows you to encrypt and sign your data and communications." This tool is useful for securing and cryptographically validating data sent via messaging applications, emails, and version-control systems, such as Git. Thankfully, the Git development team has done the heavy lifting for us and native support for GPG signing is baked into the application.
Benefits of GPG Signing
Before diving into the "how," I'd first like to address the "why." Entrepreneurs, big businesses, and all those in-between may not see a reason to incorporate GPG keys into their development flow. But if it isn’t worth using, why does Git bother to include native support for it? I’d like to make a few arguments in favor of adding this practice to everyday development.
Security
Aren’t usernames and passwords enough to keep users’ work adequately secured? Or SSH keys? The short answer is no and no. For better or worse, both mechanisms work to grant or deny access to the Git repository. Once access is granted, the engineer must go through additional steps to provide their identity before making any commits:
Once I’m granted access with either my password or SSH key, it’s game over. Imagine a scenario where a fellow engineer named Alice and I are working on a project. If I found out that my change broke in production and cost the company thousands of dollars, I could pull down the `develop` branch, claim her identity, rewrite history, and say it was Alice’s commit instead of mine. A simple run of the `git log` would tell me all I need to know about her identity. Of course, had I done something like this, the branch’s `HEAD` would diverge across the multiple Git instances, but it still proves a point. Not all hackers need brilliance to cause trouble. Had Alice signed her commits, I couldn’t impersonate her identity without the Git provider flagging my attempt as unverified and untrusted.
Confidence
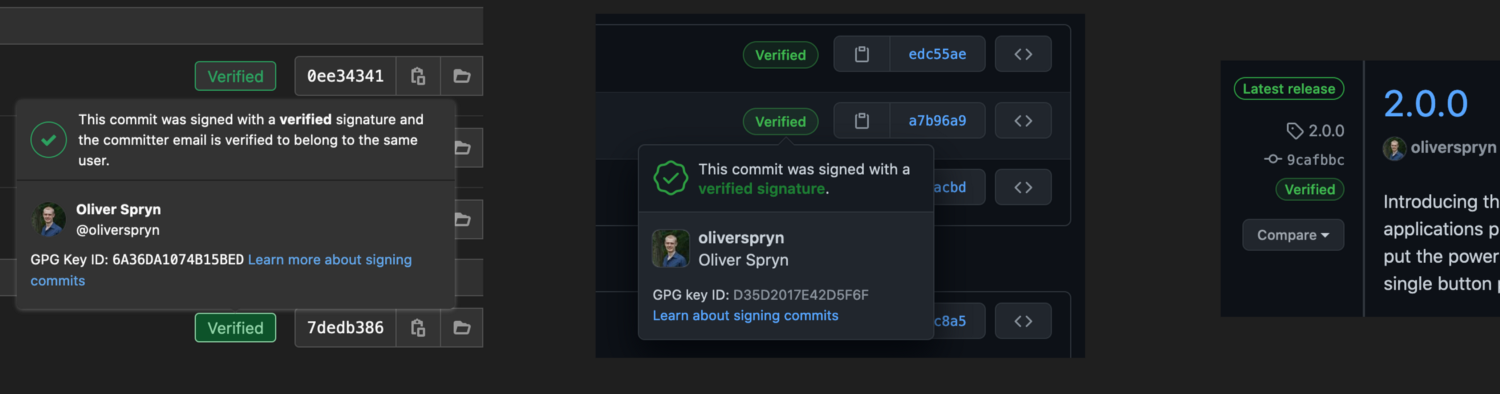
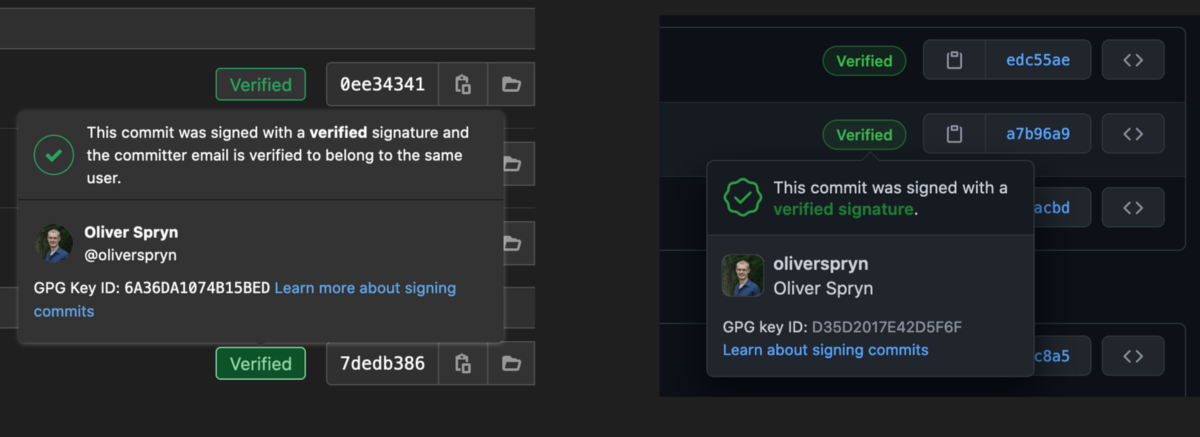
Encryption and digital signatures are all about inspiring confidence. All of the major players in the Git world reward those who go the extra mile to provide their identity with GPG. GitLab, GitHub, and Bitbucket all show a badge next to each commit whose author has signed it with GPG. GitHub goes further to indicate when a verified author signs their tags and releases. Talk about a friendly pat on the back!
Simplicity
For engineers, cryptography is often synonymous with pain. Did your key expire? Time to generate a new one and put it in all of the right places. Did you forget to use your key here? Well, you’ve just opened up a big hole. Etcetera, etcetera. In my opinion, Git makes it so easy to use that I find no reason not to. I tell Git what GPG key to use, ask it to sign each commit for me, and proceed using Git like I always have. Business as usual couldn’t be any easier.
Create a Key Pair
GPG provides much flexibility in configuring the creation of your key. Personally, these are the options I like to use:
- Key type: RSA and RSA, an asymmetric key pair for encryption and decryption.
- Bit length: 4096 for the highest amount of entropy.
- Expiration date: None. Entirely up to you and your use case, but I’m only here to prove my identity on Git, not rotate my keys to guard state-sponsored secrets.
The process is quite simple:
- Open a terminal.
- Type `gpg --full-generate-key` to enter the creation flow.
- Select the desired key type. For me, I selected `1` for RSA and RSA.
- Enter the bit length. I used `4096`.
- Specify the validity duration, using `0` to indicate no expiration. That was my choice. It will ask you to confirm your selection.
For the next few prompts, I line up my answers with the identity values I provide to Git.
- For the real name prompt, enter your display name. Of course, mine is `Oliver Spryn`.
- The email address should match your commit email. In my example, I used `oliverspryn@example.com`, but in the real world, I prefer to use the masked email that GitLab and GitHub provide me. This feature is a nice added layer of privacy that many major Git providers offer.
- For the comment, I leave a human-readable description to indicate where I plan on using this key. In my example, I used `GitLab GPG Key`.
Here’s a video of that flow in action:
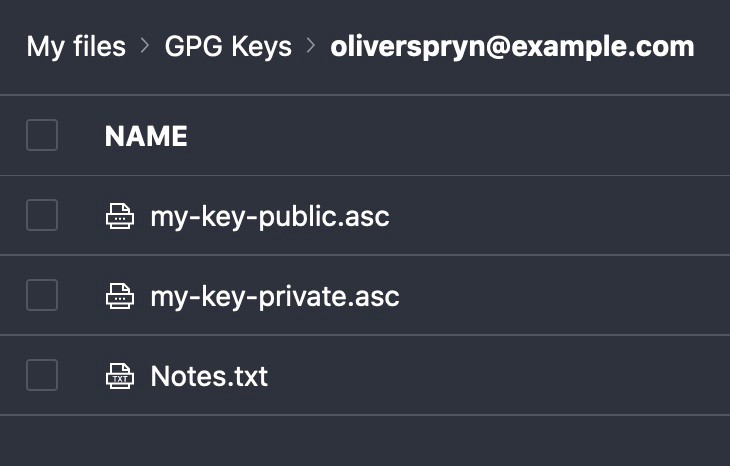
Export the Key Pair
Signing your commits won’t be of much use unless your Git provider can validate them. Therefore, we’ll need to export the public key to share with GitLab and GitHub. I’ll also export the private key to keep it safe in my password vault should I get a new computer or accidentally lose my local copy.
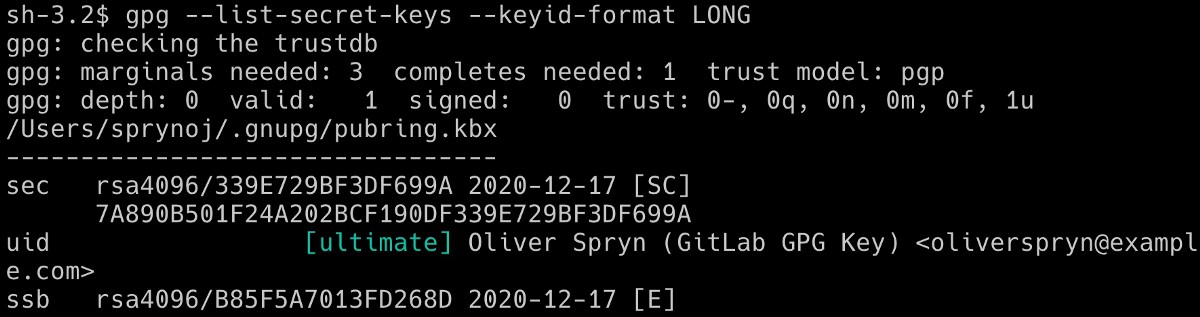
To begin, we need to tell GPG which key we intend to export. Start by listing all the keys on your current system:
This should yield a result like this:

Of course, if you have more keys on your computer, you’ll see them all show up. I’m interested in one particular piece of information, the long key ID. It shows up twice, once in a shorthand version and again with the complete ID. Here is the difference:

Notice how I am referring to the IDs beside the word `sec`. At the bottom of the picture is another ID beside the phrase `ssb`. The IDs at the top refer to the secret key (i.e., "sec"), and the ID at the bottom refers to the secret subkey (i.e., "ssb"). For this purpose, ignore the `ssb` ID.
You can refer to the intended key by its short ID for the next step, but I prefer to be explicit and use its long ID for precision. Armed with the long key ID, use it to export both the public and private keys:
Keep both of these files safe. Very safe. I like to put them in either my LastPass or my ProtonDrive Vault. Any locked away and encrypted file storage should do the job well.
Using the Key
Just like telling Git your name and email, you can also provide the GPG key configuration. Again, using the long key ID is preferable here for greater precision. I’ll use that ID in my command below and follow up with another configuration option telling Git to always use that key for each commit, even if I neglect to be explicit about it during the commits in my development cycle.
Now, Git signs all of your commits with GPG without any changes to your workflow. Just commit like you always have. You can verify all signed commits like this:
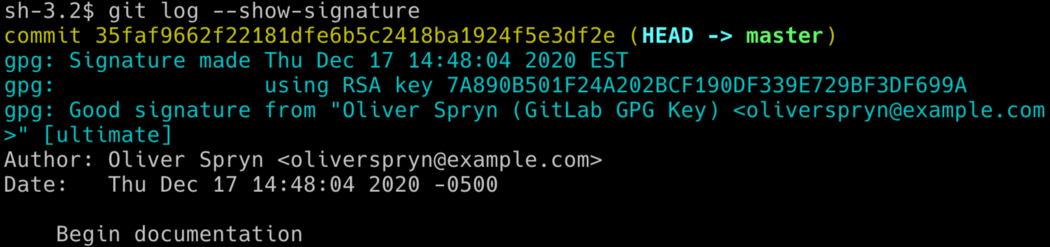
Of course, Git will only tell you if the commit is properly signed if you are the only person on the team or working on a distributed team and each person has the public keys of the entire team. Otherwise, you’ll see Git report trust issues with commits signed by your teammates. In this case, I don’t bother and refer to GitLab and GitHub when I want to make sure someone has signed a commit properly. This way is a bit easier since the Git provider is responsible for holding all of the public keys, and each teammate must use the website to keep her or her public key up to date.
If you don’t tell Git to sign your commits automatically, you’ll need to do so at each commit:
I’ve found that signing tags is still a manual process, though:
Notice the difference between the above two lines. Signing a commit uses the capital `-S` as a flag, and the tagging operation uses a lower case `-s`. That would not be the first Git idiosyncrasy I’ve encountered!
All in all, the headache of using GPG with your everyday workflow is almost gone. Indeed, this level of ease makes any argument against using it quite challenging to believe.
Exporting the Key to GitLab and GitHub
Under the hood, I asked GPG to generate an RSA key pair for me. As with any asymmetric key, you’ll need to share the public key with a third-party if you intend to share any information with them. Of course, since we’re talking about pushing to Git repositories, we will most certainly share information. Thankfully, GitLab and GitHub makes this process easy.
Before importing the public key to any Git provider, make sure you open up the public key you exported earlier in your favorite text editor. Please make sure you open the public key, not the private key.
GitLab
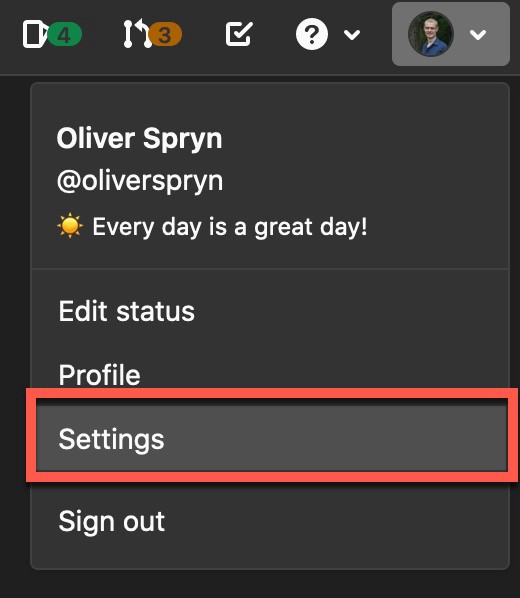
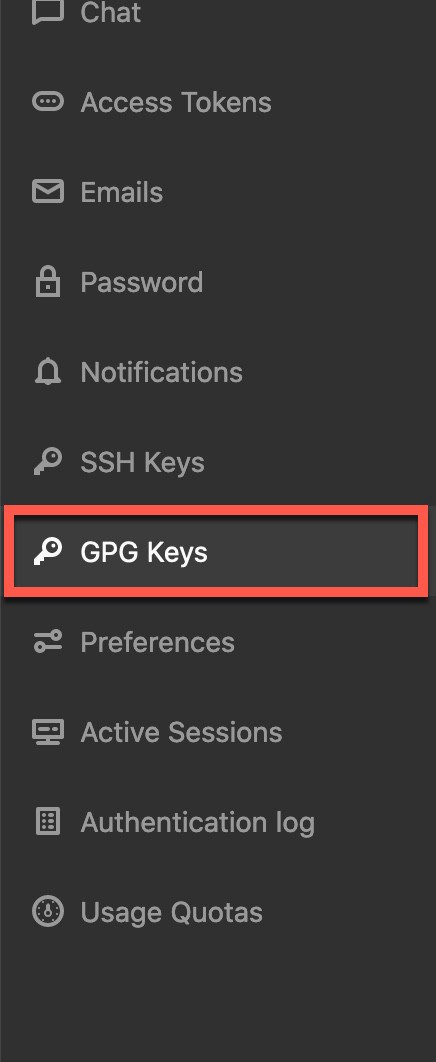
This process is the same, whether you use GitLab.com or GitLab self-hosted. Log into your account, select your profile at the top-right, and go to Settings.
From the panel on the left, choose GPG Keys.
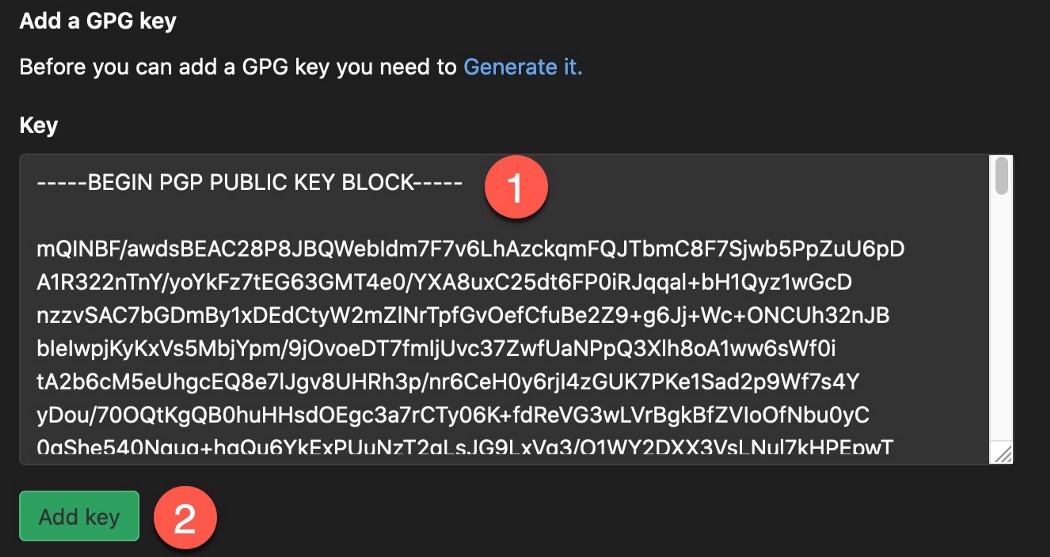
Paste the public key into the text box, and press the Add Key button.
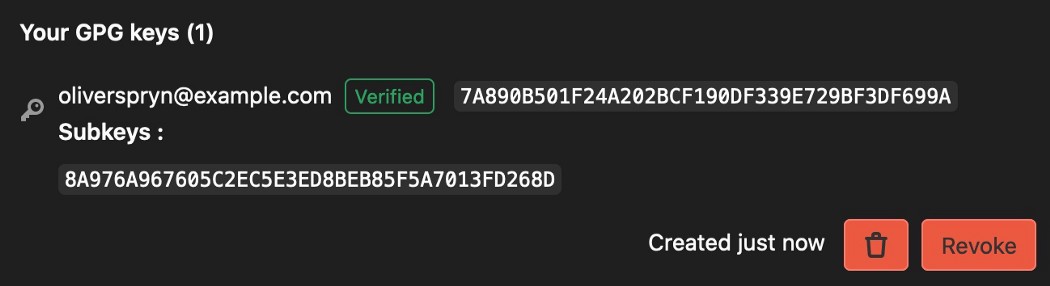
Observe the key in your GPG key list.
GitHub
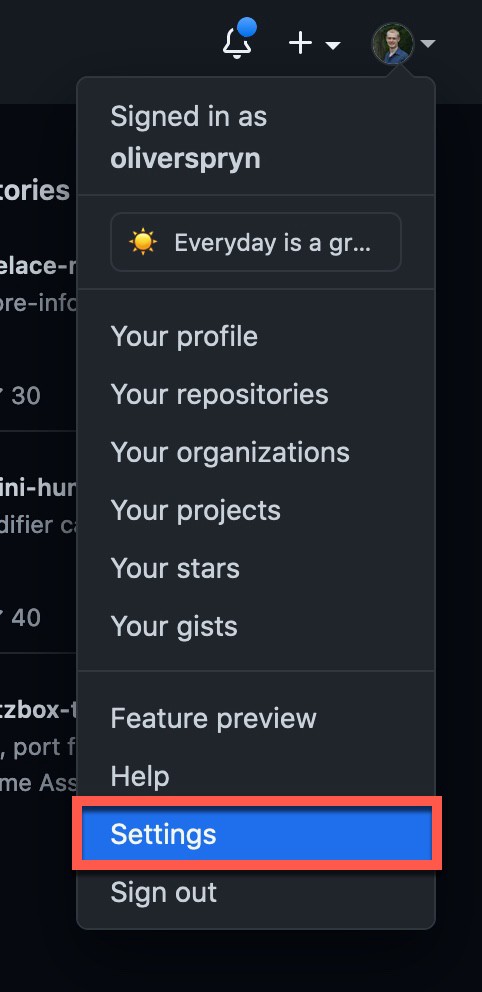
You will find that installing a key onto GitHub is similar to GitLab’s process. Login to your account, select your profile at the top-right, and go to Settings.
From the panel on the left, choose SSH and GPG Keys.
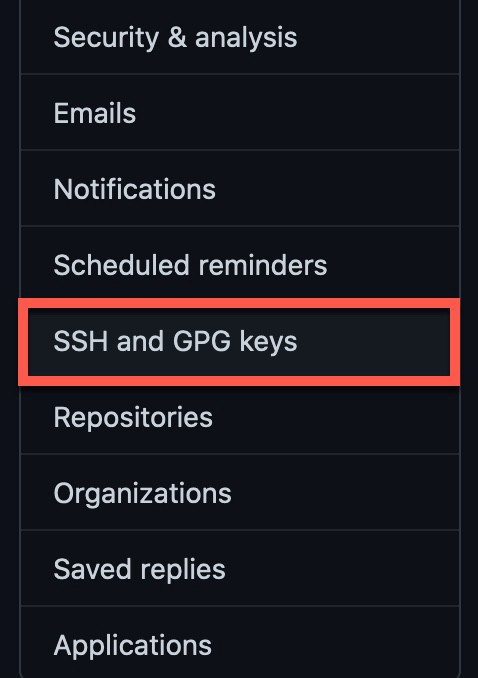
Press the New GPG Key button.

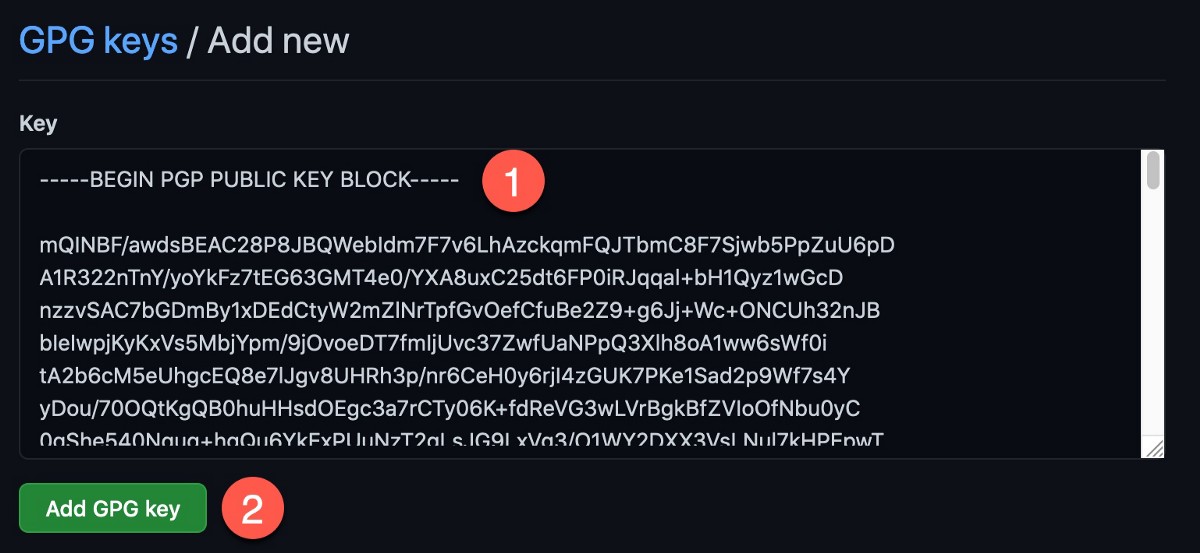
Paste the public key into the text box, and press the Add Key button.
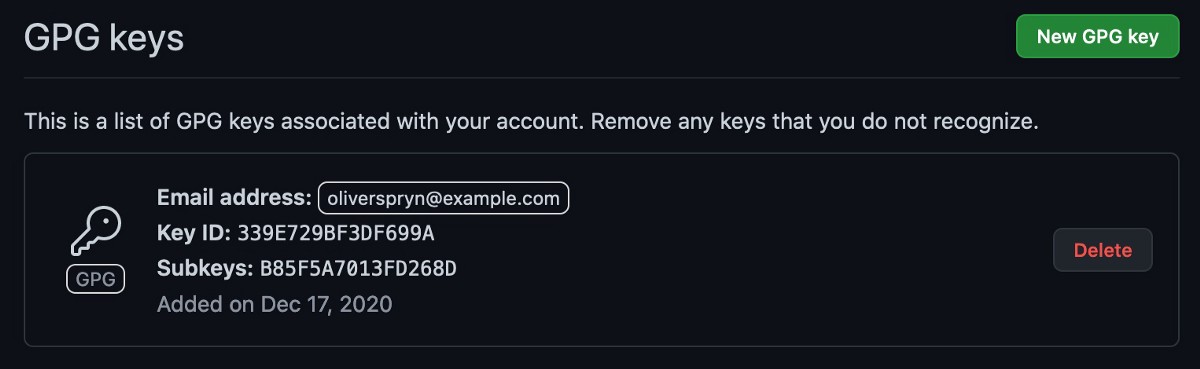
Observe the key in your GPG key list.
Key Storage
Disasters are something we hope to never have, but for which we should always prepare. Storing your keys in a safe place could help avert the most painful aspects of such an event. As I stated earlier, I like to use one of two places to hold this kind of information: LastPass or ProtonDrive. No, these companies have not sponsored me to recommend them, but they work well enough to deserve an unsolicited recommendation!
LastPass
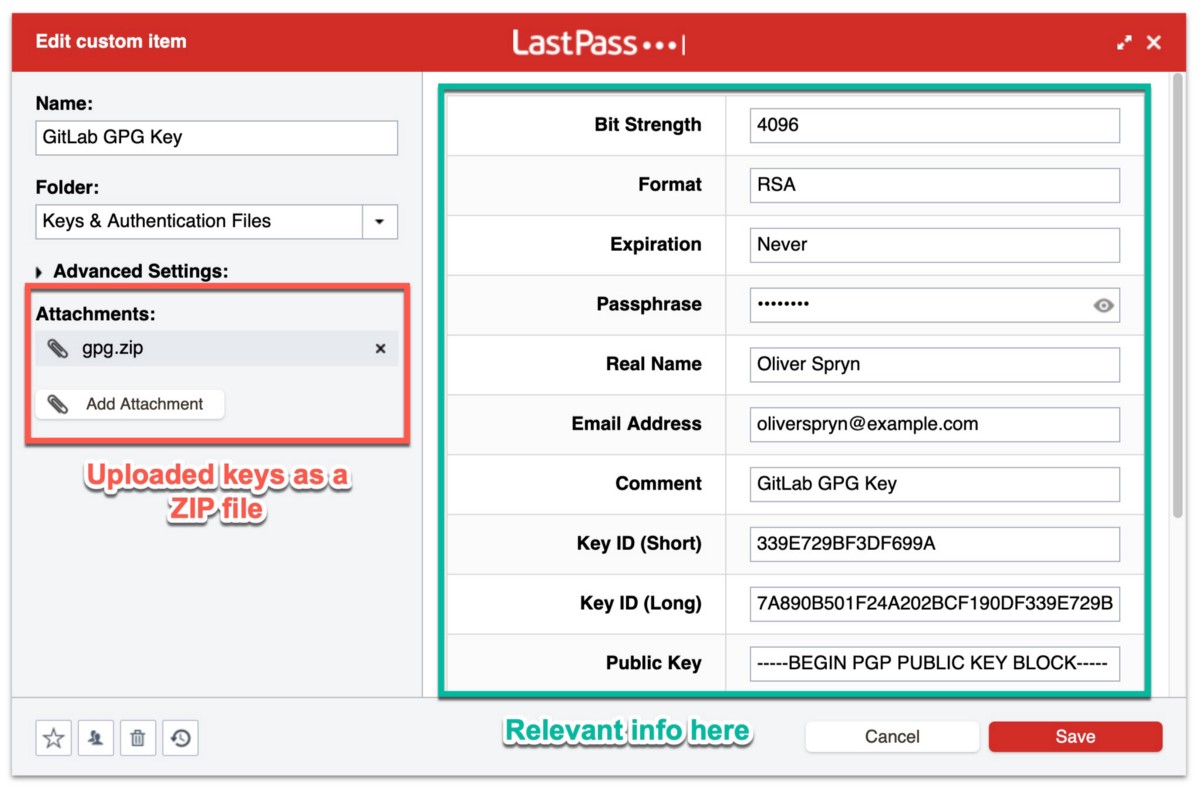
Even on their free account, LastPass allows you to place binary files in encrypted storage. Since I manage several GPG keys, I created a custom item type for all of the information I would ever want to know about my keys. Here’s what it looks like:
ProtonDrive
I also like ProtonDrive as it’s a fully encrypted, zero-access file storage service. A more common alternative, if you prefer, would be something like the OneDrive Personal Vault. The idea is the same in both places. I drop each key in the encrypted vault, along with a note containing the password, and it’s ready for use in the future, should I need it again.
Importing Keys
Did you suffer data loss on your development machine? Did you get a new computer? Do you need to work on a second computer? All of these are valid reasons to crack open your vault and import your keys. Once you download the `.asc` files to your new setup, typing these commands will add the public and private keys to your keychain:
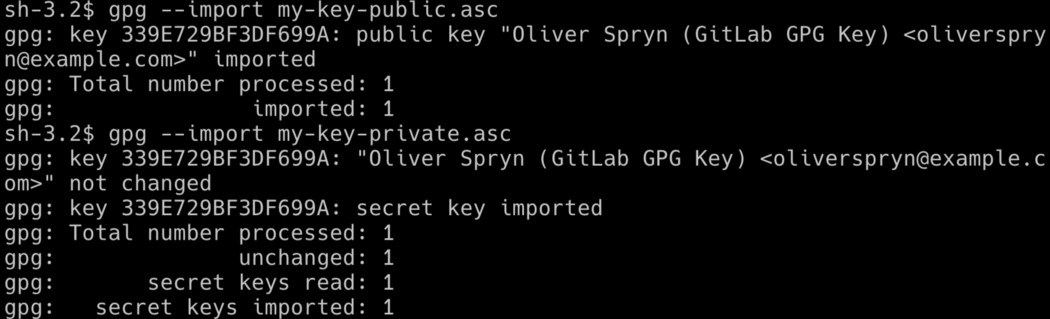
Notice how I import the public key before the private key. Let’s double-check to see if that worked as expected:

Unfortunately, while the key is present in the keychain, it does not have the system’s trust since this machine is not responsible for creating the key in the first place. Let’s fix that:
- In your terminal, type: `gpg --edit-key key-id`, where `key-id` is the ID of the key you intend to edit.
- You have entered the GPG command-line editor.
- Type the word `trust`.
- Since this is your key, you should be able to give it ultimate trust in your system. So, at the trust level prompt, enter `5` for ultimate trust and confirm your choice. This level is the same trust value assigned to the key whenever you created it in the first place and used it on the same machine.
- Type `quit` to exit the GPG prompt.
Double-checking our work again shows what we are looking for. The key pair is available and has ultimate trust in the system.
Troubleshooting
As part of my day job, I use a Macbook. On this setup, Git and GPG work together nicely. However, I prefer to use Ubuntu on my personal projects, and I’ve noticed that GPG doesn’t work when I try to use it on that platform right out of the box. If you run into problems signing your commits on Ubuntu or any other Linux distribution, you may need to install GPG2. Here is the issue I encounter when trying to sign a commit on Ubuntu:

Here’s how I correct this issue on Ubuntu and other Debian-based systems:
Then, I instruct Git to use `gpg2` instead of `gpg` as the signing program:
From there, I use `gpg2` to try and sign a simple string, and I encounter yet another error message:

From there, I open up my `~/.bashrc`, `~/.bash_profile`, or `~/.zshrc` (depending on your shell), and add the following line to the script:
After making the necessary changes to the file, restarting your terminal, or `source`ing the correct script will incorporate your changes. Re-running the above signing command yields a successful outcome:
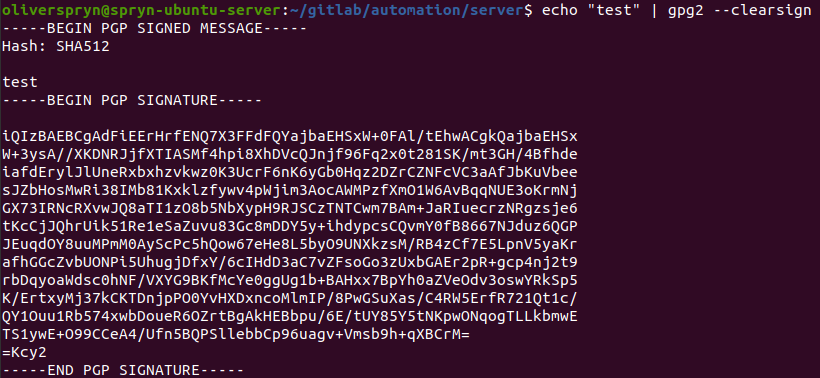
The outcome of this command shows that GPG2 is ready to start working with Git. Everything else about using Git with GPG and interacting with GPG is the same. However, instead of using `gpg` as the terminal command, use `gpg2`, instead.
Credits
Even though I’ve been using GPG together with Git for several years, I learned quite a bit while researching the information to write this article. Here are some of the resources I used to help me better understand this process:
.svg)


 DR Android


